
Planes My Father Flew
Jeff Maples builds MisterCraft 1:144 Sud Se-210 'La Caravelle'
|
In the year 1956, my father (Billy G Maples) left the USAF to begin his career in commercial aviation. I’m going to jump to 1961 (which is translated into skipping the other planes he flew that I have not built yet), when dad was with United Airlines and would be until he retired.
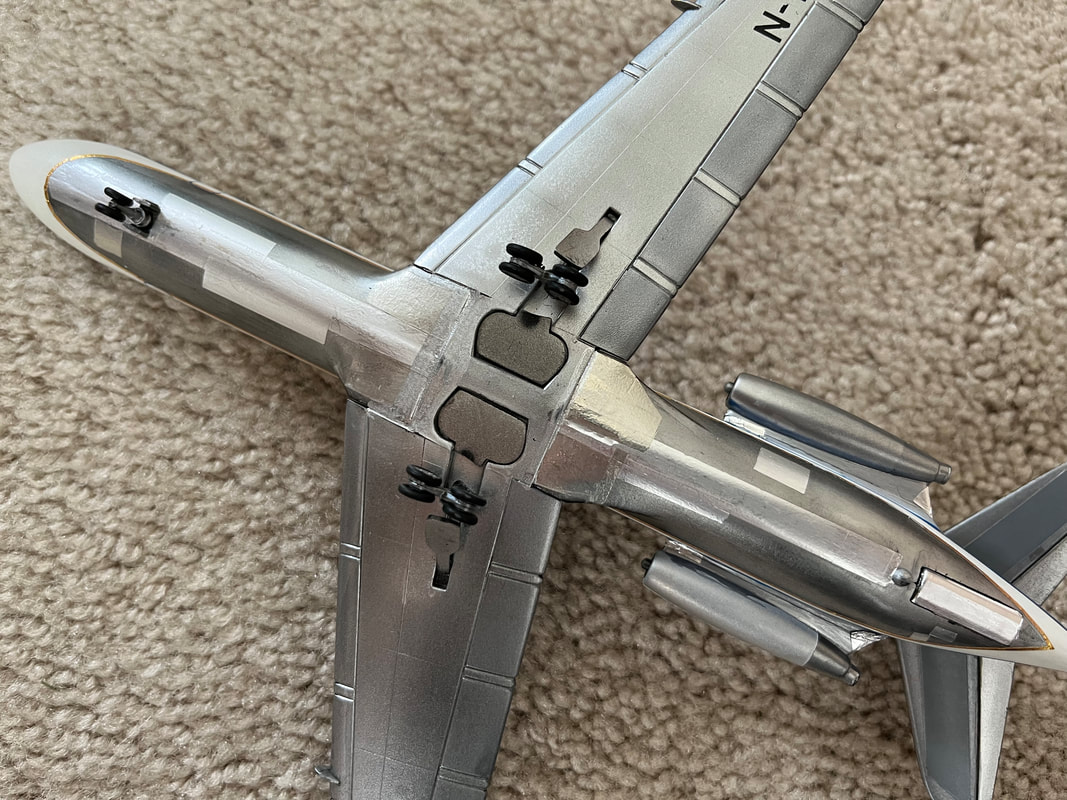
His first assignment with United was as a co-pilot on the fairly new French built Se-210 or otherwise known as La Caravelle. The Caravelle was a popular late 1950’s twin engine (mounted on the tail) luxury commercial aircraft where the passengers boarded the plane from a staircase at the tail. Ooh La La. So, the model I chose to build to honor my father’s aircraft legacy was the MisterCraft 1:144 Se-210 with United Airlines decals. Now, there are a number of other kits out there of the 210, however, I am trying to keep all of Billy’s commercial jet planes at a 1:144 scale. This will be harder for the prop planes; but what can you do? I should start off by stating that I began this build in mid-2021 (2 years ago) and to remember my state of mind way back then is hard as I don’t remember what I did yesterday. I will say when I started, I did not want to mask all 30 small (1:144 scaled) windows. So, I tried a different technique I read about in Fine Scale Magazine (Aaron Skinner) where you spray the two halves of the fuselage with white primer (Tamiya), top white final coats (Testors rattle-can dull white), and metallic bottom (Alclad II Aircraft Aluminum). {Footnote: use dull white as it adheres better on the sharp edges like a rudder. The final coats of Clear Gloss will get rid of the dull finish}. Then glue in rows of clear plastic windows into the inside of the fuselage halves. This way…No Masking . Now, glue the halves together and tape off the seams running on top and bottom of the now completed fuselage, apply your putty to fill seams, sand smooth, and finally spray your white stripe. In a perfect world, this would have worked for me like it did for Mr. Skinner, however, what I didn’t do first was to make sure everything fit perfectly AND I should not have sprayed the metallic belly on both separate fuselage halves. Now, I have a bi-colored sprayed fuselage with much work still to be done to make it look good. By the time I finished filling and sanding, I had marred the metal Alclad II finish. At this time I also realized I had painted the port nacelle and the starboard nacelle the same which means one engine was correct with white on top and metallic on bottom BUT the other one (when put in position) was metallic on top and white on bottom. Still, I persevered and thought I should test the decals as they are original and around 20 years old. Other than the United decals, I was supplied with Scandinavian Airlines, too. So, I took a few of the SAS decals and popped them into some warm water and POOF!...they completely disintegrated. Ugh! I am now at both the end of the year (December 2021) and my rope. DownEastCon 2022 is only 7 months away and I have projects to work on for that contest. So, the MisterCraft Se-210 is taxied to the Shelf-of-Shame where it will stay tied-down for 8 months. Okay, DEC is over and I’m looking for a new project and as I pull a kit out of my stash; guess what goes crashing to the ground but the Caravelle. Thank you Modeling Gods, as I was ready to re-examine this fiasco. By chance and a few months earlier, a fellow builder in the Eagle Squadron was giving away packets of Bare Metal Foil in all different colors. It just so happened, I never filed the packets away and thought, “Instead of re-masking the metallic scuffed belly; what if I cover up the scratches with different colored patches of Bare Metal Foil.” I cut them like an aircraft’s panels and put them in position where needed and, what do you know?...it looked great. I then masked off the (now better looking) belly plus used Micro Mask (the gel) to cover the windows (YES! After all this avoidance of having to mask 30 windows, here I am doing just that) before putting on a light coat of final white which had been lightly sanded to get smooth again. I now had a renewed enthusiasm for the build and quickly fixed the one engine nacelle to white on top/metallic on bottom, sprayed the wings a variety of Alclad II metal colors, and basically finished painting and all the fiddly bits. I filled in any seams that needed help and used a Molotow Silver Marker (bought at Hobby Lobby) to paint over the seams I filled. Again, this added to the interesting variety of metallic colors without being to Patch-Work Quilt looking. |
Now, the moment of truth…the decals. I knew what came in the box would not work UNLESS I sprayed a few more coats of Testors Clear Gloss Lacquer (a bonding agent for the dye). With this done, again I used SAS decals and ‘Lo and Behold’ the decals did not dissolve. Phew! But (confession time) that was only on the small decals. The large blue United stripe that goes from bow to stern/port and starboard was too long to hold together. I decided if I was to finish this model I would have to paint the blue stripes. Well, the windows were still masked, so let’s go for it.
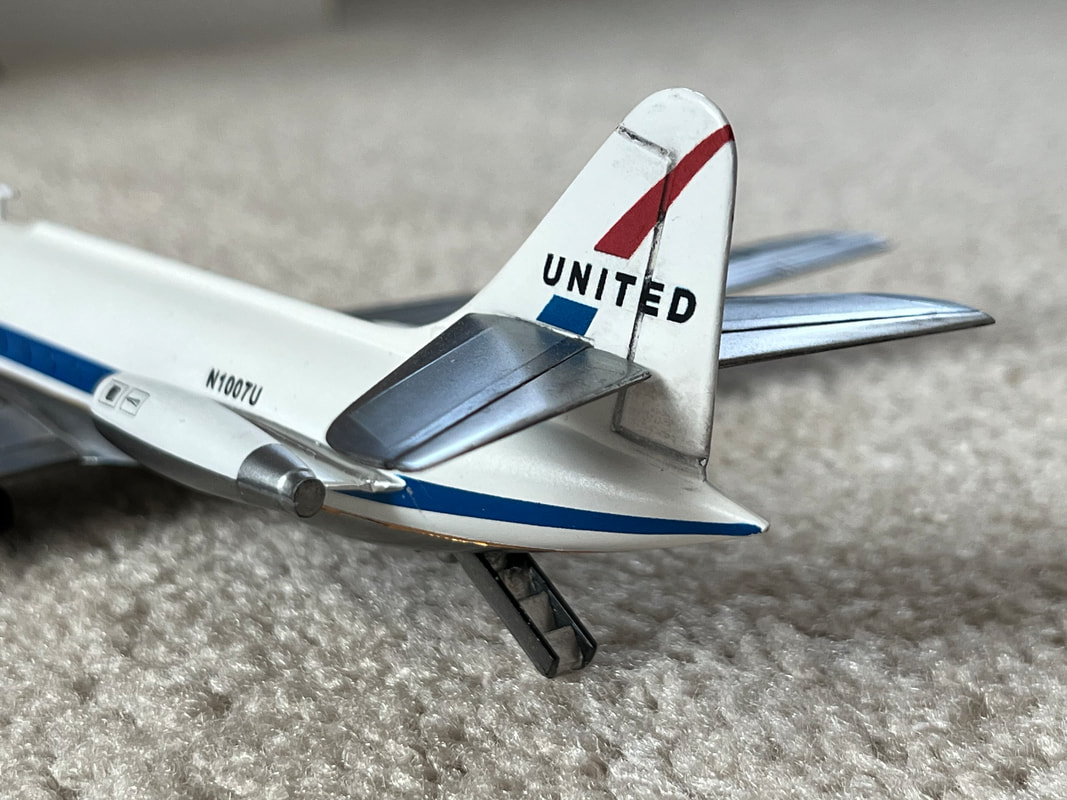
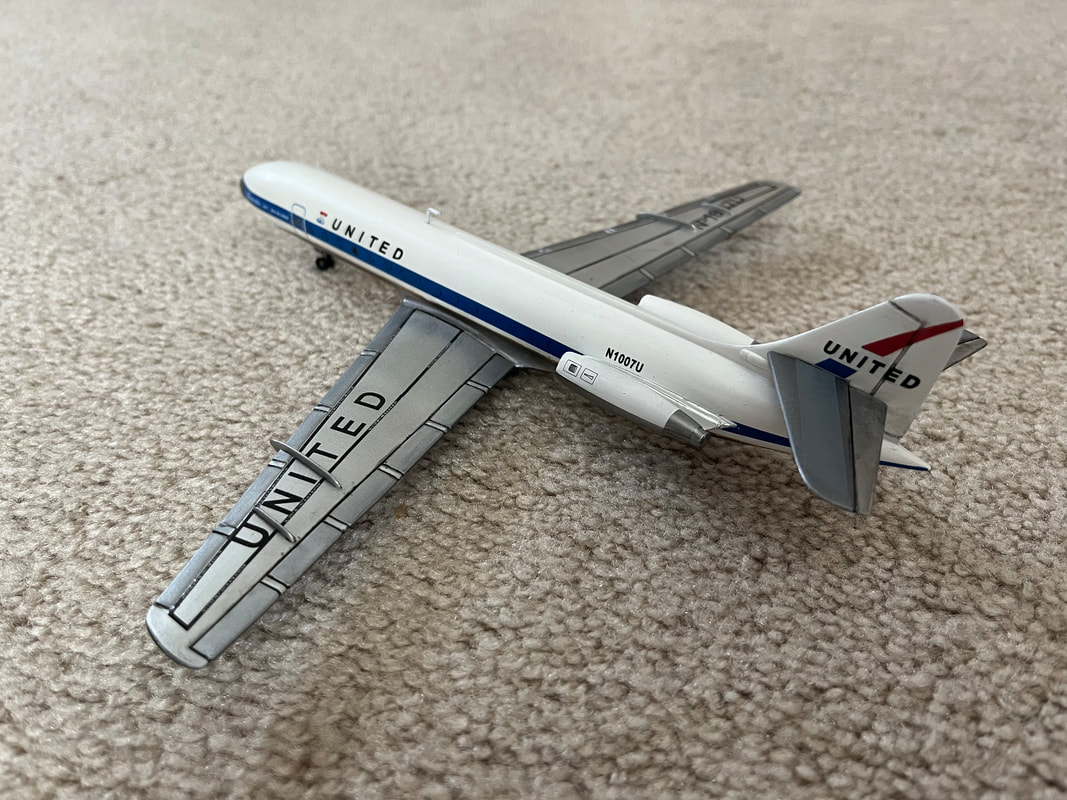
I knew from other United kit builds that Testors Dark Blue was an almost perfect match for their corporate color and that was easy to attain. I masked off both sides and the nose with Tamiya tape and then decanted the Dark Blue into a small bottle so I could airbrush the paint on. I did not trust a wide spray from the rattle can for such a thin line. Jumping to the end, the blue stripes turned out great and I was very pleased. All the other small decals stayed in one piece and though the wing ‘No Walk’ stencil decals broke up a little bit, I could use them along with using a black Sharpie to fill in the breaks. The next to last thing to do was apply the thin (very thin) gold strip that divides the body color white and the bare metal belly. Again, I went to my new Bare Metal Foil gold color and very carefully cut a thin strip in sections 2” to 3” long. I slowly applied each strip and, with my eye, pressed them down parallel to the blue stripe. The nose was done with much shorter strips due to the quick curve. The gear had not been glued on yet knowing I would spray several coats of Gloss Lacquer to give the plane a nice shiny professional look. Once dried, all the gear and antennae were glued on, and I could finally call it done. The end of the story is really this…I had decided that this particular model would go to my great nephew Alex, and I would build another Caravelle for myself to display with my other ‘Dad’s Planes’ but do it a little differently and more carefully. I already have a new MisterCraft kit ready for assembly. But until I give it to Alex, I made all the rounds to my models clubs showing off the finally finished Shelf-of-Shame model and going through all the above horror stories. As I look at the model now, sitting on the table next to my computer, I realize for the first time (and after all of the showings)…I never took the Micro Mask off the 30 windows. Oh, Jeez! Will this build never end!? -Jeff Maples |